The Problem: When “Easy Install” Isn’t Easy
I recently decided to set up the Gemini CLI on my Windows 11 machine. I watched a bunch of videos, and for everyone else, it seemed to be a simple, one-command installation.
That was not my experience.
My journey started with an npm command that failed due to security policies, and then led me down a rabbit hole of environment variables and cloud settings. This isn’t another “perfect world” tutorial. This is the real guide to what can go wrong and exactly how to fix it.
Let’s get started.
Step 1: Installing Node.js
First things first, we need Node.js, which includes npm (Node Package Manager). The easiest way to install it on Windows is using winget in your terminal.
| |
After the installation, it’s crucial to restart your terminal. This allows the system to recognize the new npm command.

Step 2: Troubleshooting Common NPM Errors
This is where my problems began. If you try to install the Gemini CLI and run into errors, here are the two most likely culprits on Windows.
Problem A: “npm: The term ’npm’ is not recognized…”
After installing Node.js and restarting your terminal, you run the install command:
| |
And you see this error:
| |
Solution:
- Restart your terminal again. Sometimes the system just needs a fresh start.
- Check the installation. Run
npm -v. If it’s installed correctly, you will see a version number (e.g.,10.8.1). If you still get an error, your Node.js installation failed or the PATH variable was not set correctly. Try reinstalling Node.js.
Problem B: “npm.ps1 cannot be loaded…”
This was my main issue. The error looks like this:
| |
Solution: This error means your PowerShell security policy is blocking the script from running. To fix this, you need to change the execution policy.
- Open PowerShell as an Administrator. (Click Start, type “PowerShell”, right-click, and select “Run as administrator”).
- Run the following command:
1Set-ExecutionPolicy RemoteSigned - PowerShell will ask for confirmation. Type
Yand press Enter. - Close the administrator PowerShell window and restart your regular terminal.
Now, when you run npm install -g @google/gemini-cli, the installation should complete successfully.
Step 3: The “Secret Sauce” - Google Cloud Setup
After a successful installation, you’ll want to log in by running gemini auth login. But you might immediately hit another wall:
This is the most important step that many tutorials miss. The Gemini CLI needs to be linked to a specific project in Google Cloud.
Solution:
Create a Google Cloud Project: Go to the Google Cloud Console. If you don’t have a project, create a new one. Give it a memorable name (e.g., “My Gemini Stuff”). Once created, you will see a Project ID (e.g.,
my-gemini-stuff-12345). Copy this ID.Set the Environment Variable on Windows:
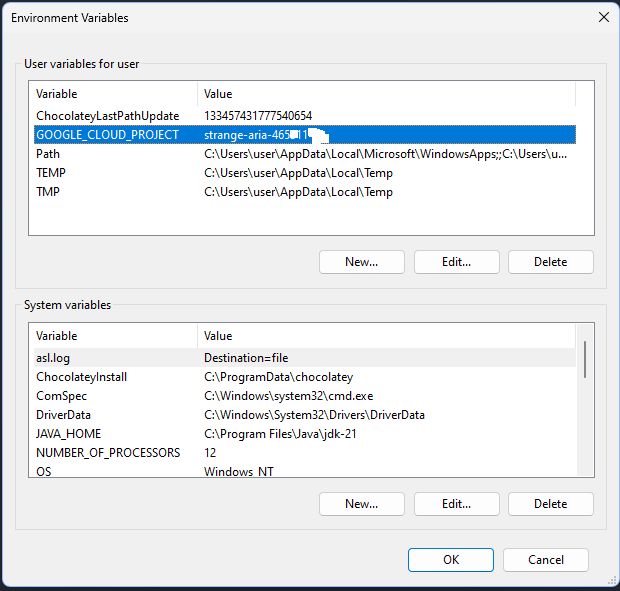
- Open the Start Menu and type “Environment Variables”.
- Select “Edit the system environment variables”.
- In the window that opens, click the “Environment Variables…” button.
- In the top section (“User variables”), click “New…”.
- For Variable name, enter:
GOOGLE_CLOUD_PROJECT - For Variable value, paste your Project ID.
- Click OK on all windows to close them.
- Restart your terminal or your entire computer for the changes to take effect.
Step 4: Enable the API
You’re almost there. You try to run a command, and you get one last error:
Solution: Your project exists, but the specific Gemini API is not turned on for it.
- Go back to the Google Cloud Console.
- Make sure your project is selected at the top of the page.
- In the search bar, type “API & Services” and go to that page.
- Click on “+ ENABLE APIS AND SERVICES”.
- Search for “Vertex AI API”.
- Click on it and then click the big blue “ENABLE” button. Wait a minute for it to activate.
Step 5: Success!
Now, you can finally run the login command without any issues:
| |
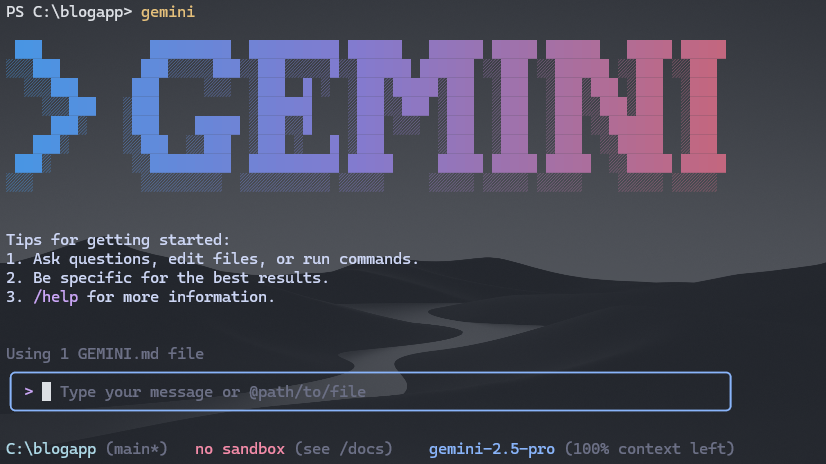
This will open a browser window for you to log in with your Google account. After that, your Gemini CLI will be fully configured and ready to use.
I hope this detailed, real-world guide saves you the hours of frustration I went through. It’s a perfect example of how the “simple” things in tech often have hidden depths.